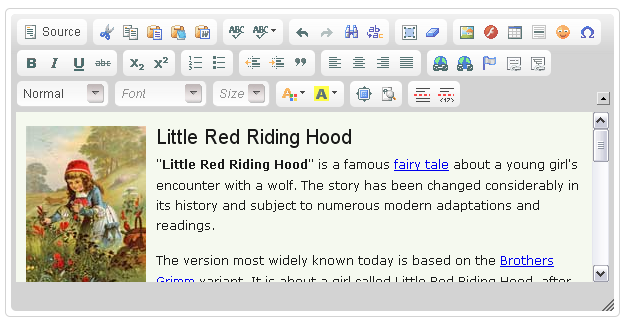
ここではサイトの更新時に役立つCKeditor、CKfinderの紹介をします。

CKeditorのデモはこちら
https://office-goto.info/demo/ckeditor/
CKeditorのダウンロード
http://ckeditor.com/
CKfinderのダウンロード
http://cksource.com/ckfinder
CKeditor、CKfinderの実装
head
<script src="ckeditor/ckeditor.js"></script>
<script src="ckfinder/ckfinder.js"></script>
ckeditor.jsとckfinder.jsを読み込んでください。
html
<textarea id="eventContents" name="eventContents"></textarea>
textareaタグでid、nameをターゲット指定してください。
改行 Enterでbrタグを指定する
デフォルトでEnter改行するとpタグが、Shift+Enterならbrタグが挿入されるので、これを
Enter改行ならbr、Shift+Enterならpタグに変更します。
ckeditor/config.js
CKEDITOR.editorConfig = function( config ) {
    // Enterキー押下時のタグ
    CKEDITOR.config.enterMode = CKEDITOR.ENTER_BR;
    // Shift+Enter押下時のタグ
    CKEDITOR.config.shiftEnterMode = CKEDITOR.ENTER_P;
};
idでツールバーや幅、高さを指定
<script type="text/javascript">
var editor = CKEDITOR.replace( 'eventContents',{
    width  : '500px',
    height : '300px',
    toolbar: [
                ['Source','Bold','Italic','Underline','Strike','-','Subscript','Superscript']
                ,['NumberedList','BulletedList','-','Outdent','Indent','Blockquote']
                ,['JustifyLeft','JustifyCenter','JustifyRight','JustifyBlock'],'/'
                ,['Link','Unlink','Anchor']
                ,['FontSize']
                ,['TextColor','BGColor']
                ,['ShowBlocks','Maximize','About']
            ]
});
    // CKfinder設定
    CKFinder.setupCKEditor(editor, 'app/js/library/ckfinder/');
</script>
body内の一番最後に記述してください。
これでidごとにツールバーなどを変えてCKeditorを複数実装できます。
細かな設定がいらない場合
<textarea class="ckeditor"></textarea>
Javascriptを書かなくてもclass指定で実装できます。
idから要素を取得
var bar = CKEDITOR.instances.eventContents.getData();
jQueryの$(‘#eventContents’).val();では内容は取れてこないので注意が必要です。
CKfinderでファイルのアップロード
/ckfinder/config.phpを編集します。
function CheckAuthentication()内の
return false;を
return true;に書き換えます。
$baseUrl = ”;
をファイルのアップロード先に変更すれば設定完了です。
