月別アーカイブ: 2012年8月

Google Calendar APIで祝日登録

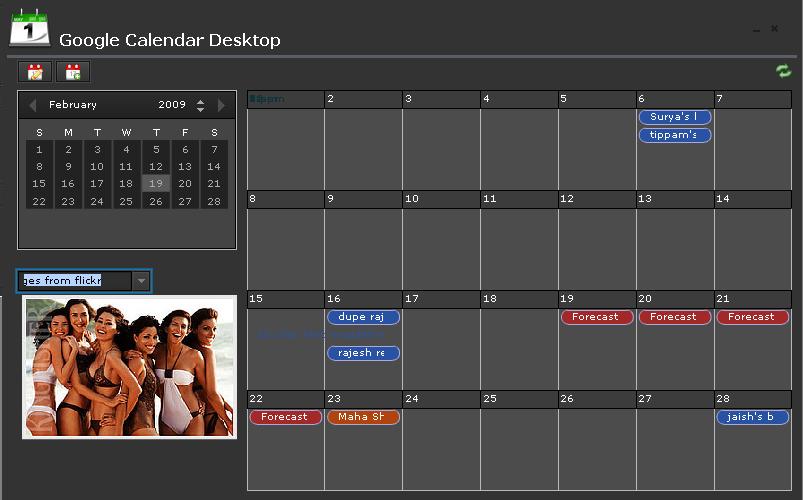
ここではGoogle Calendar APIを使ってDBに祝日を登録していきます。
google-calendar

サンプルソース

<?php
  
    // DB接続
    $url = "localhost";
    $user = "root";
    $pass = "pass";
    $db = "dbname";
    $link = mysql_connect($url,$user,$pass) or die("MySQLへの接続に失敗しました。");
    $sdb = mysql_select_db($db,$link) or die("データベースの選択に失敗しました。");
  
    $holidays_url = sprintf(
        'http://www.google.com/calendar/feeds/%s/public/full-noattendees?start-min=%s&start-max=%s&max-results=%d&alt=json' ,
        'outid3el0qkcrsuf89fltf7a4qbacgt9@import.calendar.google.com' , // 'japanese@holiday.calendar.google.com' ,
        '2013-01-01' ,  // 取得開始日
        '2013-12-31' ,  // 取得終了日
        50              // 最大取得数
    );
    if ($results = file_get_contents($holidays_url)) {
        $results = json_decode($results, true);
        $holidays = array();
        foreach ($results['feed']['entry'] as $val) {
            $date  = $val['gd$when'][0]['startTime'];
            $title = explode('/', $val['title']['$t']);
            $holidays[$date] = trim($title[0]);
        }
  
        ksort($holidays);
        foreach ($holidays as $key => $value) {
            if (!($value == '振替休日')) {
                $sql =  "INSERT INTO mtb_holiday (name, date) ".
                        "VALUES ('".$value."','".$key."')";
                mysql_query($sql, $link);
            }
        }
    }

解説

正確には元旦なら$dateに2012-01-01、$titleに元日 / Ganjitsu / New Year’s Day、が取れてくるので$titleを元旦だけにフォーマットしています。

また祝日が土曜日か日曜日に被ると振替休日 / Furikae kyūjitsu / Substitute Holidayが取れてくるので振替休日以外のものをDBに登録しています。

良かったら4~7行目を書き換えて利用してください。

PHP png gif画像透過を保持したままリサイズ

ここではPHPで画像リサイズ時に透過処理を保持したままリサイズをする解説です。
※このライブラリはGDがインストールされていることが条件です。

Smart Image Resizing while Preserving Transparency With PHP and GD Library | Medium eXposure
http://mediumexposure.com/smart-image-resizing-while-preserving-transparency-php-and-gd-library/
こちらのライブラリを使用します。

リンク切れが多いのでソースを張っておきます。

<?php
function smart_resize_image( $file, $width = 0, $height = 0, $proportional = false, $output = 'file', $delete_original = true, $use_linux_commands = false )
{
    if ( $height <= 0 && $width <= 0 ) {
        return false;
    }
  
    $info = getimagesize($file);
    $image = '';
  
    $final_width = 0;
    $final_height = 0;
    list($width_old, $height_old) = $info;
  
    if ($proportional) {
        if ($width == 0) $factor = $height/$height_old;
        elseif ($height == 0) $factor = $width/$width_old;
        else $factor = min ( $width / $width_old, $height / $height_old);
  
        $final_width = round ($width_old * $factor);
        $final_height = round ($height_old * $factor);
  
    }
    else {
        $final_width = ( $width <= 0 ) ? $width_old : $width;
        $final_height = ( $height <= 0 ) ? $height_old : $height;
    }
  
    switch ( $info[2] ) {
        case IMAGETYPE_GIF:
            $image = imagecreatefromgif($file);
            break;
        case IMAGETYPE_JPEG:
            $image = imagecreatefromjpeg($file);
            break;
        case IMAGETYPE_PNG:
            $image = imagecreatefrompng($file);
            break;
        default:
            return false;
    }
  
    $image_resized = imagecreatetruecolor( $final_width, $final_height );
  
    if ( ($info[2] == IMAGETYPE_GIF) || ($info[2] == IMAGETYPE_PNG) ) {
        $trnprt_indx = imagecolortransparent($image);
  
        // If we have a specific transparent color
        if ($trnprt_indx >= 0) {
  
            // Get the original image's transparent color's RGB values
            $trnprt_color    = imagecolorsforindex($image, $trnprt_indx);
  
            // Allocate the same color in the new image resource
            $trnprt_indx    = imagecolorallocate($image_resized, $trnprt_color['red'], $trnprt_color['green'], $trnprt_color['blue']);
  
            // Completely fill the background of the new image with allocated color.
            imagefill($image_resized, 0, 0, $trnprt_indx);
  
            // Set the background color for new image to transparent
            imagecolortransparent($image_resized, $trnprt_indx);
  
        }
        // Always make a transparent background color for PNGs that don't have one allocated already
        elseif ($info[2] == IMAGETYPE_PNG) {
  
            // Turn off transparency blending (temporarily)
            imagealphablending($image_resized, false);
  
            // Create a new transparent color for image
            $color = imagecolorallocatealpha($image_resized, 0, 0, 0, 127);
  
            // Completely fill the background of the new image with allocated color.
            imagefill($image_resized, 0, 0, $color);
  
            // Restore transparency blending
            imagesavealpha($image_resized, true);
        }
    }
  
    imagecopyresampled($image_resized, $image, 0, 0, 0, 0, $final_width, $final_height, $width_old, $height_old);
  
    if ( $delete_original ) {
        if ( $use_linux_commands )
            exec('rm '.$file);
        else
            @unlink($file);
    }
  
    switch ( strtolower($output) ) {
        case 'browser':
            $mime = image_type_to_mime_type($info[2]);
            header("Content-type: $mime");
            $output = NULL;
            break;
        case 'file':
            $output = $file;
            break;
        case 'return':
            return $image_resized;
            break;
        default:
            break;
    }
  
    switch ( $info[2] ) {
        case IMAGETYPE_GIF:
            imagegif($image_resized, $output);
            break;
        case IMAGETYPE_JPEG:
            imagejpeg($image_resized, $output);
            break;
        case IMAGETYPE_PNG:
            imagepng($image_resized, $output);
            break;
        default:
            return false;
    }
  
    return true;
}

解説

$file
加工する画像

$width
変更後の横幅

$height
変更後の縦幅

$proportional
アスペクト比を保持するか
true or false

$output
file = 上書き
return = GDオブジェクト

$delete_original
加工前のファイルを削除するか。
true or false

$use_linux_commands
画像の削除方法
true = rm
false = unlink

Ubuntu インストール直後

ここではUbuntuインストール直後にやることをまとめています。

ubuntu

ディレクトリ名を英語に

$ LANG=C xdg-user-dirs-gtk-update

アラートが出てくるのでOKで設定できます。

avastインストール

avast! Linux Home EditionのDEBファイルをダウンロード
http://www.avast.co.jp/linux-home-edition

インストールコマンド

$ sudo dpkg -i avast4workstation_1.3.0-2_i386.deb

起動時にエラーが出た場合の対処法

$ rm -r ~/.avast
$ sudo gedit /etc/sysctl.conf
$ sudo sysctl -p

1行目でホームディレクトリの.avastを削除
2行目でsysctl.confにkernel.shmmax=134217728を追記
3行目で設定を反映
これで解決できると思います。

起動コマンド

$ avast

初回起動のみライセンスキーを打ち込んで設定完了。
Linuxのavastはwindowsとは違い常駐ではないのでユーザーの任意で走らせてください。

Skypeインストール

Skype for Linuxのダウンロード
http://www.skype.com/ja/download-skype/skype-for-linux/
ダウンロードしたパッケージを右クリックでソフトウェアセンターからインストールしてください。

システムトレイのSkypeアイコン登録

$ gsettings get com.canonical.Unity.Panel systray-whitelist
$ gsettings set com.canonical.Unity.Panel systray-whitelist "['JavaEmbeddedFrame', 'Wine', 'Update-notifier', 'skype']"

2行目の[‘JavaEmbeddedFrame’, ‘Wine’, ‘Update-notifier’]のところを1行目で返ってきた値に変更してください。
ログアウトか再起動で確認できます。

geditの文字化けをなくす

$ gsettings set org.gnome.gedit.preferences.encodings auto-detected "['UTF-8','CURRENT','SHIFT_JIS','EUC-JP','ISO-2022-JP','UTF-16']"
$ gsettings set org.gnome.gedit.preferences.encodings shown-in-menu "['UTF-8','SHIFT_JIS','EUC-JP','ISO-2022-JP','UTF-16']"

geditで読み込み判別の文字コードを指定して、保存時の文字コードを指定できるようにします。

vimの文字化けをなくす

最新のvimをインストール

$ sudo apt-get apdate
$ sudo apt-get install vim

ホームディレクトリに.vimrcを作成して以下を記入

:set encoding=utf-8
:set fileencodings=ucs-bom,iso-2022-jp-3,iso-2022-jp,eucjp-ms,euc-jisx0213,euc-jp,sjis,cp932,utf-8

rpmインストール

$ sudo apt-get install alien dpkg-dev debhelper build-essential
$ sudo apt-get install rpm

コンバート

$ sudo alien hoge.rpm

インストール

$ sudo dpkg -i hoge.deb

Ubuntu PHPEclipse Xdebug導入

ここではLinux Ubuntu12.04 64bitにXdebugを導入します。

ubuntu

ダウンロード

Xdebugは32bitのものでなければ動きません。
私のUbuntuは64bitだったのでソースからコンパイルでは起動しませんでした。
なのでコンパイル済みのXdebugを入手します。

ダウンロードはこちら
http://code.activestate.com/komodo/remotedebugging/

解説

PHP Remote Debugging ClientのLinux (x86)をダウンロードして展開

$ cd Downloads
$ tar xvzf Komodo-PHPRemoteDebugging-7.1.0-72530-linux-x86.tar.gz

xdebug.soを/opt/lampp/lib/php/extensionsにコピー

$ cd Komodo-PHPRemoteDebugging-7.1.0-72530-linux-x86/5.4
$ sudo cp xdebug.so /opt/lampp/lib/php/extensions

Xdebugのパスやパラメーターをphp.iniに追記

zend_extension = "/opt/lampp/lib/php/extensions/xdebug.so"
xdebug.profiler_append = 0
xdebug.profiler_enable = 0
xdebug.profiler_enable_trigger = 0
xdebug.remote_enable = 1

eclipse-phpを起動しディバックの構成でXdebugを指定で完了です。

Ubuntu PHPEclipse インストール 日本語化

ここではLinux Ubuntu12.04 64bitにPHPEclipseをインストールして日本語化まで行います。
※この記事は先にJava jdkの設定が終わっているのが前提です。

ubuntu

ダウンロード

Eclipse PDT 3.0.x All In Onesをダウンロード
http://www.eclipse.org/pdt/downloads/

展開

$ cd Downloads
$ sudo tar xvzf eclipse-php-3.0.2.v20120611144-x86_64.tar.gz -C /usr/local

これで/usr/local以下に展開されます。

日本語化

Pleiades ダウンロードから安定版をダウンロード
http://mergedoc.sourceforge.jp/

展開

$ cd Downloads
$ sudo unzip pleiades_1.3.4.zip -d /usr/local/eclipse-php

eclipseを展開した場所に上書きしてください。

/usr/local/eclipse-php/eclipse-php.iniの編集

$ cd /usr/local/eclipse-php
$ gksu gedit eclipse-php.ini

最後の一行に
-javaagent:/usr/local/eclipse-php/plugins/jp.sourceforge.mergedoc.pleiades/pleiades.jarを追加
これで日本語化の完了です。